Sunday, 20 May 2012

Thyme and Asparagus stuffed chicken thighs

Whenever we had chicken or turkey at home I'd always go right for the darker leg meat - with my absolute favourite being the oyster mmmmm.  I tend to find the white breast meat a bit bland and dull even if it is well cooked and seasoned, and that the legs, thighs and wings have tons more flavour with much less effort.  Plus - if you are buying chicken pieces its also about half the price - more tasty + less money = bloody brilliant in my world.


This isn't terribly innovative I suppose - its just something I wanted to try out and an adaption of something an ex-boyfriend used to make as his cooking-to-impress-people dinner - and it worked!  It was delicious and simple - create a pocket in a chicken breast, stuff it with cream cheese and herbs, wrap it in foil and bung it in the oven - et voila - guests impressed and pats on the back all around.  I've rather destroyed the simple bit with this recipe, but I had time on my hands on a Sunday and a very clear idea in my head of what I want to achieve.

The end result should be a tasty mix of flavours, textures and colours - from the meaty cut of chicken, a crispy Serrano shell, a creamy and crunchy interior and a lovely fragrance from the thyme.  I went off piste and this time it turned out pretty well!

Ingredients:
Serves 2 or 3 depending on how hungry/greedy you are

  • 4 chicken thighs
  • 1 tub of garlic and herb cream cheese
  • 6 fresh asparagus spears
  • 4 slices Serrano ham (or other similar finely sliced proschiutto)
  • bunch of fresh thyme
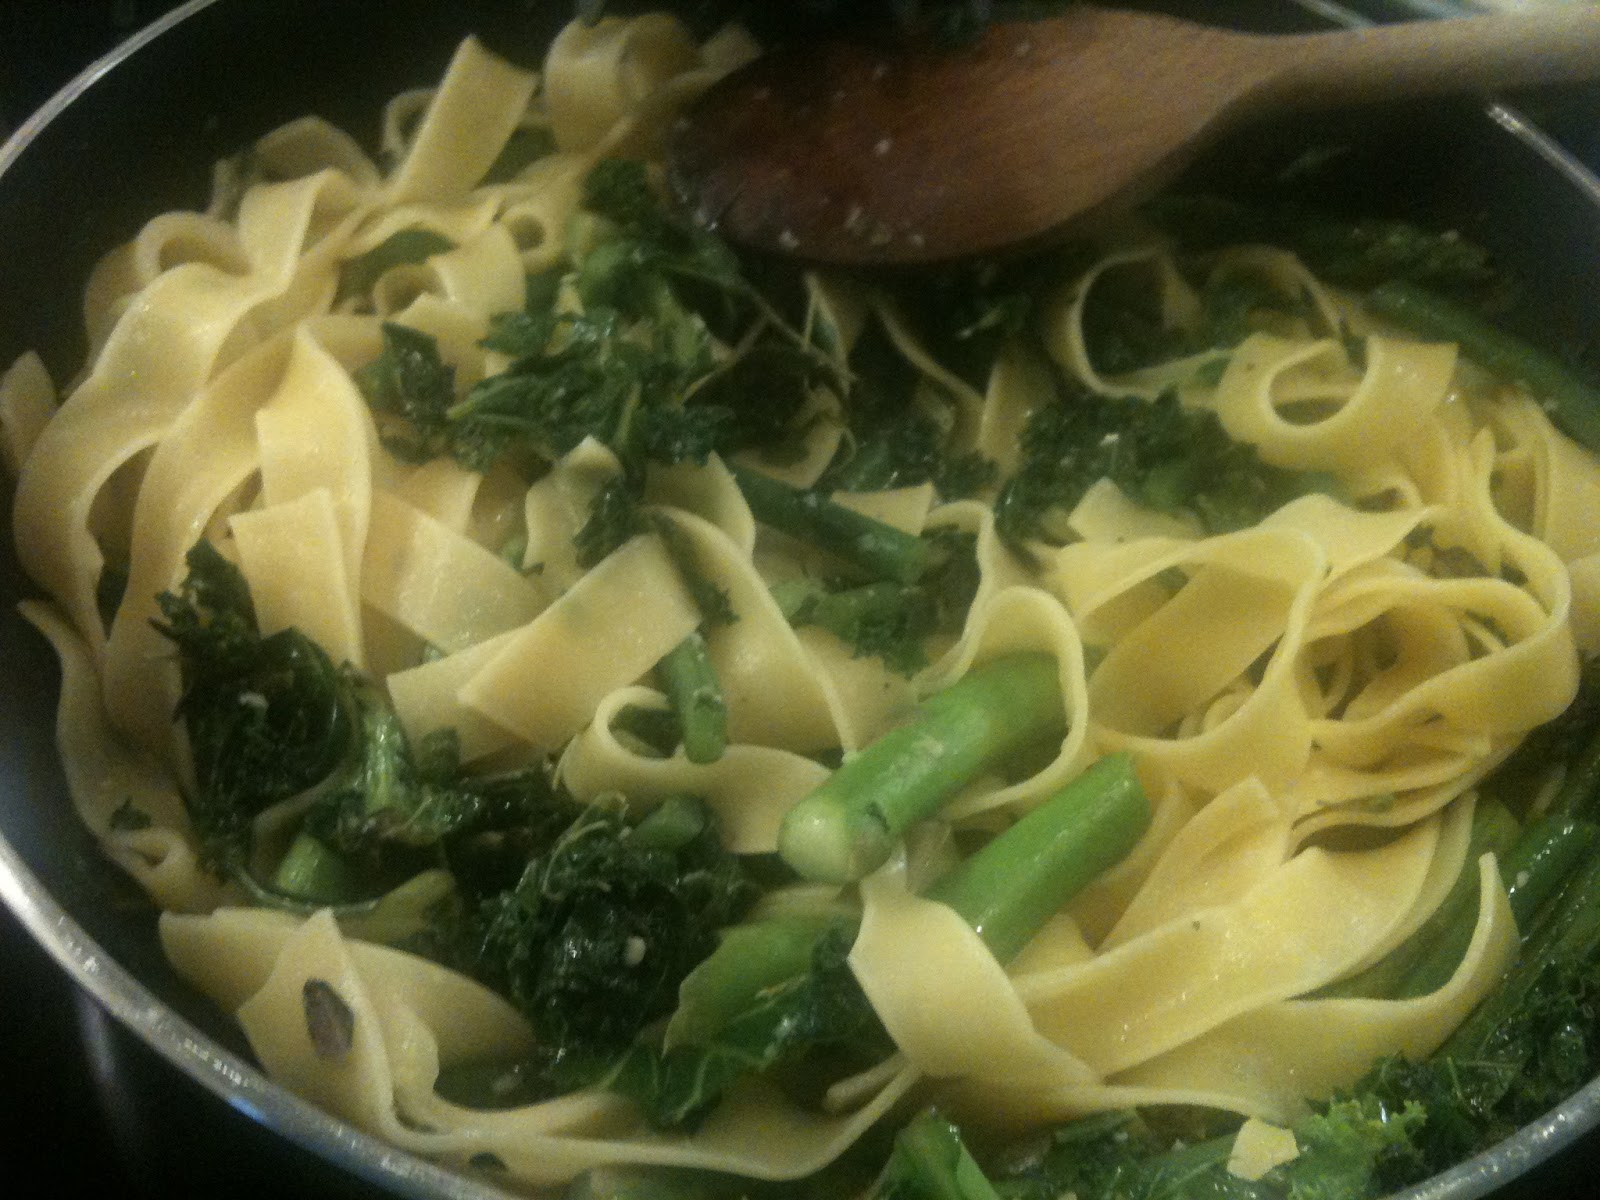
I served it with parpadelle with green vegetables and thyme but you could serve it with new potatoes and green veg - whatever you fancy really. 


  • Remove the skin and bone from the chicken thighs so that you end up with one piece of meat - of there is a very thick bit then butterfly it out a bit.  I'm not going to attempt to describe how to do this - this vid is a pretty good demonstration:
  • Wash the asparagus and snap and discard the thick part of the stalk.  Cut the asparagus in to pieces that are approx the same length as your chicken thigh bones.  Place in a container with a lid, cover in boiling water, replace the lid and leave for 2 minutes.  Drain and plunge into ice water to cool.  This part cooks the asparagus and helps it maintain its bright colour. 
 
  • Drain the asparagus and leave to dry.  Strip the thyme leaves from the stalks and discard the stalks.
  • Lay one slice of Serrano ham on its packing cellophane, some greaseproof paper or some cling film. Sprinkle with some of the thyme leaves

  • Lay one of the thighs length way along the ham.  Spread a heaped dessert spoon of cream cheese over the central third, add a few more thyme leaves and lay three pieces of asparagus across the centre of the thigh.


  • Now its rolling time.  Take hold of one end of the cellophane and use it fold over the edge of the ham and chicken.  Using the plastic, roll the chicken up like a swiss roll so that you have the asparagus in the centre - keep it as tight as you can.  Repeat this for all four thighs.
      

  • Wrap you little meaty parcel tightly in cling film and chill in the fridge for a couple of hours.  This helps the roll to set in to its new shape and for the chicken to take on more flavour from the thyme, cream cheese and Serrano ham.  It also means that you can easily do this fiddly bit in advance.

  • When you're ready to cook, pre heat the oven to C180 for a fan oven, slightly hotter for a conventional oven.  You now need to change your wrapping - remove the cling film and wrap in foil.  I found that putting them in the centre of a square of foil and then folding the sides in so that the overlap was at the top worked the best.  I tried rolling it and twisting the ends like a Christmas cracker but there was definitely more leakage this way.
  • Place on a baking sheet in the oven for about 25 minutes.  While they are cooking, prepare your pasta or what ever you've decided to serve it with.

  • After 25 minutes remove from the oven, open the little parcels and carefully pour the liquor into a bowl or jug.  If you are making the parpadelle recipe then pour the liquor into the pasta sauce.
  • Leave the chicken sat in their parcel but pull back the foil.  Pop them back in the oven for 5 minutes to crisp the outside slightly.
  • Remove and put all four pieces on to a board or warmed plate to rest for a moment.  Again collect any of the juices from the parcels or that appear while the meat rests.
  • Either serve your rolled, stuffed chicken thighs whole or slice them into 4 or 5 pieces each, and   lay out prettily on top of your pasta or beside your chosen accompaniments if you are feeling fancy. If not using the reserved cooking liquor in the pasta sauce, then keep it warm and serve as a jus with your finished dish.

  • Devour with alacrity and marvel at your skill!


Saturday, 19 May 2012

Parpadelle with green vegetables and thyme

Despite being a bit on the messy side, Parpadelle is one of my favourite pastas.  It's broad, flat strips allow the sauce to cling to them and coat them turning them into delicious silky ribbons -  I prefer it with a creamy, oily or really meaty sauce, rather than say a tomato based sauce. Apparently the name comes from the Italian for "to gobble up" so just watch you don't end up with that sauce coating your chin as well!

Parpadelle


Parpadelle has become fairly ubiquitous now - I got mine in an Italian promotion at Marks & Spencer, and its in most supermarket pasta aisles, any Italian Deli worth its salt or very easy to track down online.  If you don't have any, then Tagliatelle would be my next choice - or you can use cooked or fresh lasagne sheets and cut them into nice thick strips.  But that is a bit of a faff - so any pasta will be fine - I'd try and get a long one out of preference.

Parpadelle with green vegetables and thyme with stuffed chicken thighsThis recipe was actually something I made completely on the fly to go with another dish - the scrumptious stuffed chicken thighs (pictured).  But, when it came to eating it, I thought it was good enough to stand on its own.  I've given a couple of variations below that really help it stand alone, depending on what you have available.  Its really very versatile - so just go with it!


Ingredients:
These amounts will serve about 4.
  • Parpadelle - enough for the number of people you are feeding
  • 3/4 cloves Garlic - crushed or very finely chopped
  • Half a leek or 2/3 spring onions
  • 2 tbsp Good Olive Oil - or a good slosh in the pan
  • Selection of green vegetables, I used:
    • handful of fine green beans, topped and tailed, and cut in half
    • 6 Asparagus spears, cleaned and cut in to 2 inch chunks
    • 1 cup frozen peas
    • 2 big handfuls of kale - or a leafy green veg like spinach, rocket or chard
  • 1/2 glass of dry white wine
  • Salt and pepper
  • Cream cheese - any kind except the chocolate one!  I used Garlic and herb medium fat Philly.
  • Fresh Thyme leaves - I used about half a pack of the ones you get in the supermarket
Option 1 - serve with the stuffed chicken thigh recipe
Option 2 - Pancetta/smoked bacon - cubed
Option 3 - Prosciutto - Parma/Serranno/Black Forest etc - finely sliced preserved ham from the country of your choice.  Tear each slice into 2 or 3 pieces.

Method - for option 1.  The others will be explained at the end.
  1. Drop the parpadelle into a big vat of boiling salted water, cook to just shy of the manufacturers instructions.  You want it to finish off its cooking in the sauce. 
  2. Take a large frying pan or saucepan (the bigger the surface area on the heat the better) and warm the olive oil over a low-medium heat (3 or 4 on my cooker).  Add the garlic, a big teaspoon of fresh thyme leaves and the chopped leeks or spring onion and soften gently until translucent.  You aren't frying these - you aren't looking for colour so if they start to turn golden or brown, turn down the heat.
  3. Turn up the heat to medium and add the asparagus and fine green beans to the garlic mixture, toss them in the oil and season with a good grind of salt and pepper. Cook for about two minutes - keep it moving to make sure the garlic doesn't catch.
  4. In a bowl - cover the peas in boiling water and set aside.  
  5. Add the wine to the pan and turn up the heat so that it bubbles then add the leafy green vegetables and cover the pan.  Obviously use a lid if it has one, other wise cover with foil - we want to trap the steam and use it to finish cooking the harder vegetables and wilt the leafy ones.  You can turn down the heat if its all getting too excited under there.
  6. Allow too cook for another 2 or 3 minutes then take off the lid and see how its doing.  The kale should be softened and have reduced in volume significantly.  Reduce the heat and allow some of the liquid to boil off - but you don't want this dry, its the basis of your sauce.
  7. Drain the peas and stir into the veggie mix along with a couple of tablespoons of the cream cheese and another spoonful of the fresh thyme leaves.  If you are making the chicken thighs too, then this is the time you'd add the juice from the parcels.  Let the cream cheese melt and then taste for seasoning.  It will small amazing at this point!
  8. Your pasta should be done by now, so lift it straight from its cooking water into the vegetable pan with a pasta spoon.  Stir together well and continue cooking for another minute of so.  The ribbons of pasta should be getting a nice lustrous sheen from the sauce.  If it still looks a bit wet then keep it moving and let the liquid evaporate.  If its looking a bit dry and the pasta isn't coated evenly, then loosen it with a ladle of the the pasta cooking water.
  9. Serve in a big bowl, with a grind of black pepper and a sprinkle more of the thyme leaves.  
Parpadelle with green vegetables and thyme

Option 2 - With Pancetta or smoked bacon.  
Add the chopped pancetta or bacon to the pan right at the beginning before with half of the oil.  Cook on a medium high heat to render the fat from the bacon pieces and give them some colour and texture.  This should take about 5 minutes.  Then turn down the heat, add the garlic, leek and thyme and carry on from step 2.  

This will be a more robust flavoured dish and doesn't need the meaty accompaniment.  Make sure you don't over season at steps 3 or 7 as you will be carrying a lot more salt from your bacon.

Option 3 - With Prosciutto
This is a much more delicate version than option 2 and probably my favourite.  As the only meat element is added right at the end, its very easy to separate some of the sauce if some of the people eating it are veggies or don't eat ham - so really flexible too.

Simply tear the fine slices of ham into 2 or 3 pieces and add to the sauce at the end of step 7, while you are letting the cream cheese melt.  The subtle smoky tones of your ham will seep into the sauce and compliment the fresh green vegetables giving a more elegant result.  The ham doesn't want to be on the heat too long a sit will go tough so make sure you re nearly ready to finish and serve it before you add the ham to the sauce. 


Enjoy!

Sunday, 4 March 2012

My take on Boeuf Bourginon

Its taken AGES to get around to posting this one, but I made it again the other day and I remembered how amazing it is - so here goes....

After watching Julie and Julia I decided sheep-like that I'd track down a copy of Julia Child's book: "Mastering the Art of French Cookery" and have a go at something.  For those of you out there not familiar with the film, it follows the twin timelines of Julia Child (Meryl Streep) labouring over her masterpiece on French cooking, which in turn supplied the inspiration for frustrated office worker and fledgling writer Julie Powell (Amy Adams).  Her mission is to cook every one of the 524 recipes in the book in just one year - and write about her experiences on her blog.   One of the most quintessential recipes from the film and the book  - and one that I'd always wanted to make properly - is for Boeuf Bourginon - rich sauce, tender tasty meat - it just sounds and looks so gorgeous!
You can buy a copy of Julia Child's "Mastering the Art of French Cooking" in paperback for around £10.  I think the Julie/Julia project blog is now defunct, but I'm sure you can find it on the tinterweb if you know where to look!
So, feeling inspired, I looked up the Boeuf Bourginon recipe and set off to the shops. Standing at the meat counter in Waitrose (I don't have a local butcher) knowing I wanted some beef - I was suddenly hit by a wave of nostalgia.  My folks had a butchers shop while I was growing up, which means a constant supply of the less saleable cuts of meat.  I'm on a budget and the recipe simply called for "lean stewing beef" - ughh VAGUE.  I looked at the anonymous chucks in the braising steak section: it looked nice enough, but i wanted to know exactly what was in it so that if it worked well I could replicate the recipe. Plus i needed to find the best cut for the recipe, for my bank balance and for fullfilling my nostalgia quota. 

My eye roamed to two cheap cuts lurking at in the middle of the display between and two eye wateringly expensive ones - anobscenely large piece of fillet and some calves liver.  Now, these two aren't strictly lean, but definitely affordable at £4.99/kg I had found Oxtail and Ox cheek.  Stirring up some very tasty and comforting memories of unctuous stews and melt in the mouth meat - my mind was made up.  Then it was just a quick scuttle around to pick up the other ingredients, and try and spot any marauding celebs (Helena Bonham Carter last week) and back home to start!

Now this is not a quick dish to prepare!  My advice is to take all day so that you can approach it a leisurely pace, and enjoy the experience - make it an event - even make it the day before you intend to eat it.  These quantities should feed 6, but I'm FAR too greedy to make it stretch that far - Have fun!

Here;s my take on a classic Boeuf Bourginon - Ingredients:
  • Two whole Ox cheeks, or large slices of shin (or approx half a kilo of other stewing steak in large pieces if you have to)
  • 4 large chunks of oxtail
  • 250g smoked bacon lardons (can use streaky bacon, or if you can find it - a whole chunk of bacon as Julia calls for in her recipe)
  • Olive Oil
  • 2tbs (approx) Flour
  • 1tsp Paprika
  • 2 small carrots
  • 2 white onions
  • 2 sticks celery
  •  1 tbs Tomato Puree
  • 2 cloves of Garlic - crushed or minced
  • Large sprig of fresh Thyme
  • 1 tin beef consommee
  • 1 bottle full bodied red wine
  • 20 shallots
  • about 20 small mushrooms
  • Butter
Equipment
 - Heavy based, oven proof dish with a lid - pretty much all the action happens in here, so make sure it can both on the hob and in the oven.  I use a large heavy based saucepan, but a Le Creuset dish would be ideal.
 - Frying pan

How to...
  • Preheat the oven to 230C
  • Start by frying the bacon lardons in the pan that you will use for the whole dish. Just cook them over a moderate heat long enough that they start to brown and the fat begins to run.  Then lift them out and set aside.
  • Pat dry your oxtail and cheek pieces with kitchen towel - this is Julia Child's big tip to help ensure the meat browns.  You don't need to do anything else to them as you will be cooking them whole.

  • Add a little oil to the pan - its just to help stop the meat from sticking when you brown it, and turn up the heat to medium/high.  Now brown your ox cheeks and oxtail pieces in the oil, one or two pieces at a time put them  to one side with the bacon.  Don't over crowd the pan as you will cool it too much and not get the desired effect - you aren't trying to cook it at this point, just colour the meat. 

  • Once all of the meat is browned and removed from the pan, quickly fry the vegetables to colour them slightly.  Remove any excess oil from the pan.

  • On a plate measure out a couple of tablespoons of flour, season with salt and pepper and a teaspoon of Paprika (optional - I used because i like its mellow earthiness with the beef, but its not in the original recipe)
  • Lightly coat the beef in the flour and add it back in to the pan with the bacon pieces and sautéed vegetables

  • Now - i found this bit slightly odd, but go with it, its definitely worth it.  With the lid off, put the pan with the dusted meat pieces into the pre-heated oven for 4 minutes. Remove and stir, then put back for a further 4 minutes.  This browns the flour and forms a light crust over the meat. 

  • Remove the pan from the oven once more and turn it down to around 160C
  • Add the tin of consommé, and enough of the wine to give you enough liquid to just cover the meat (and a small glass of wine left for the cook).  If its not, then you can top it up with a little extra stock or water, or wine if you don't mind not drinking it.  Add the crushed garlic, tomato puree and thyme - and stir it all up together and bring back to the boil on the hob.
  • Now it will look odd, as you have five or 6 large lumps of meat swimming around in a big pond of liquid!  But have faith - put the lid on and put it back in the oven. 
  • Read a book.  Walk the dog. Take a bath.  Definitely open another bottle of red... because you've not got a 2 and half to three hour wait!
  • At around 2 hours you can take a peek.  The meat should be starting to get tender now, give it a stir and put it back in.  

  • If you are planning to eat it the same day, then you can add the shallots for the last half  hour of cooking, and fry the mushrooms in some butter until coloured and starting to soften, and set aside ready to add at the last minute.  If you are having it the next day, then do the shallots and mushrooms then.

  • Because both the cheek and oxtail are quite sizeable pieces of cow, you will probably find that it takes the full 3 hours to get the required level of melting tenderness.  After the three hours you should find that the meat falls off the bones of the oxtail and the that the meat from the cheek or shin can be pushed apart with a fork - the membrane in the middle which usually have to be removed to prevent it being a chewy monstrosity has magically transformed into a ribbon of unctuous goodness running through the meat.

  • Now, the original recipe calls for you to remove the meat and onions, and strain the remaining sauce to remove the other vegetables.  But I actually think they are fine to be left in, especially as this is a rustic version of Julia's original refined dish.  I would recommend removing the meat from the pot so that you can pull it from the bones and carve up the cheek meat.  At this point, try to skim off any additional fat from the sauce, and reduce on the hob if it is not thick enough.  
  • Now you can either mix it all back together like a big stew or serve the meat with the onions and mushrooms, and the sauce separately.  This is a very rich dish, so keep accompaniments simple. I'd serve with a fresh green vegetable, like green beans or broccoli and boiled spuds, noodles or my personal favourite - some crusty French bread.
 Bon Appetit!